ThymeBase’s task manager is perfect for organizing all the event to-dos for yourself, your team, and your client.
Yes, our tasks are collaborative! You can work on them with clients through the client portal or assign tasks to parters and vendors on your team.
This article will run through the basics so you can get started with the event task manager quickly.
Pro-Tip: ThymeBase is 100% mobile-friendly, so you can work on the go.
Starting From Scratch, Or Using A Template
Did you know that you can use templates in ThymeBase? I’ll show you how in a sec, but first, let’s go over the very first step of creating a task list.
Starting A Timeline From Scratch
When you click the Add Event button in your dashboard, you can begin planning events from scratch. And that means your task list is a blank slate ready for you to add tasks.
To create your first task, click the “Add task” button in the top right of the page.
Then, just enter a name for the task and click save. That’s it! But you can also add more details, including:
- Due date
- Assignee
- Add it to the client portal
- Task status
- Category
- Description (more on this below)
- Files
- Links
Using An Event Task List Template
You can also kick off event planning with a template. If you like to start with a framework, you can simply duplicate a past event (or saved template).
Pro-tip: Every ThymeBase account comes with a Wedding Template event, but we’ve got a whole library of templates. Just reach out and let us know what type of event you’re working on. We’ll add a template to your account.
Here’s how to use our template as the basis for your own event. From your event dashboard:
- Click on the kebab menu
- Select duplicate
- Enter the details of your new event

ThymeBase can recalculate all your task due dates around the new event if you enter a new event date.
Learn more about duplicating an event.
Cool Things You Can Do In Event Tasks
Add Selected Tasks To The Client Portal:
When you activate your client portal in an event, you still have plenty of control over what your client can and can’t see. That way, you can keep your internal to-dos private while assigning specific tasks to your client.
Learn how to add tasks to the client portal.
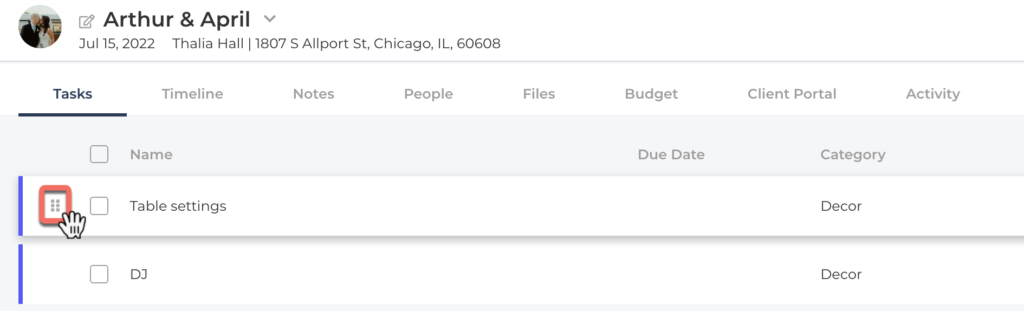
Drag to re-order tasks:
You can drag tasks around to re-order them. To do this, hover your mouse over the task and click the drag icon.
Rich Descriptions & Comments:
Here’s a fun one. Each description area, as well as the comments area, is “rich.” That means that they can handle formatting like headings, bold, italics, lists, and more.
Pro-tip: Drag an image or any file into a description area. Files will be uploaded and pictures displayed.
PDF downloads:
Every timeline offers a one-click PDF export. Click the PDF icon on the top right of any page to export the latest version of your timeline.
Comments:
You can use the comments under each timeline item to discuss the little details with your team and your client.
Note: Comments between you and your teammates won’t show in the client portal. Similarly, comments in the client portal don’t show in the main planner area. That way, you can keep internal conversations separate from client communication.
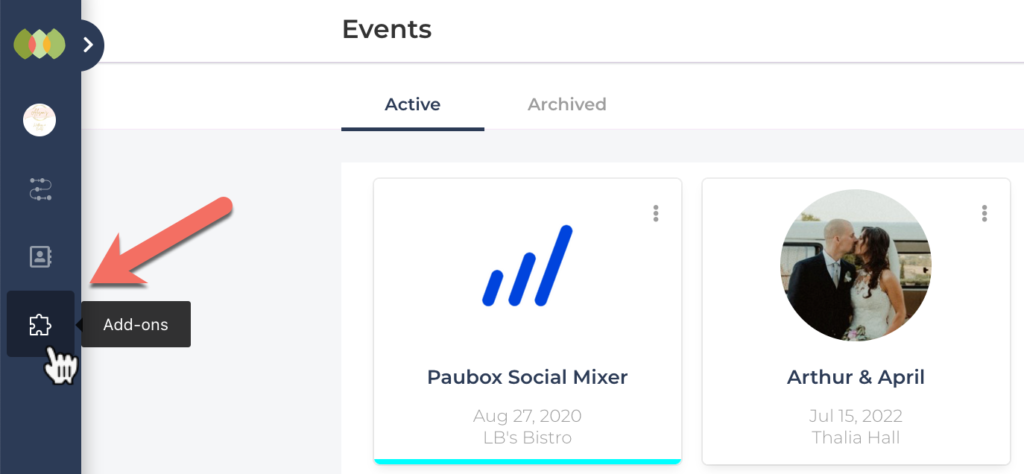
Branding:
You can brand your client portals too. Just visit the add-ons area in your ThymeBase account to upload your logo and set your color palette. You’ll find your add-ons area in the main account menu on the left-hand of any ThymeBase page.
And that’s our task manager crash course. If you ever have questions, get in touch.