Great event planning needs exceptional budgeting. And that’s why we’ve built a comprehensive, yet easy-to-use event budget tracker in ThymeBase. It’s the perfect addition to our suite of event planning software. Before we get into the step-by-step guide, I want to encourage you to explore the budget tool and share your feedback with us. We’re always improving!
Let’s begin!
Create The Budget
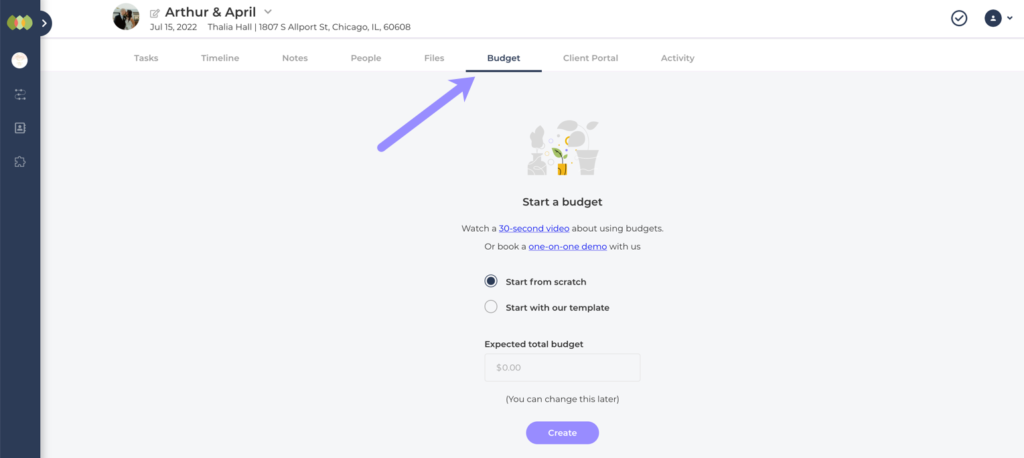
In any event, click on the budget tab. You have the option to start from scratch or start with our template. Our template includes common event expenses and groups – all you need to do is fill in your estimates and costs as you go.
Next, enter your expected budget and click the create button. Don’t worry if you don’t have an expected budget just yet – you can leave it blank or enter something and change it later.
Adding Groups
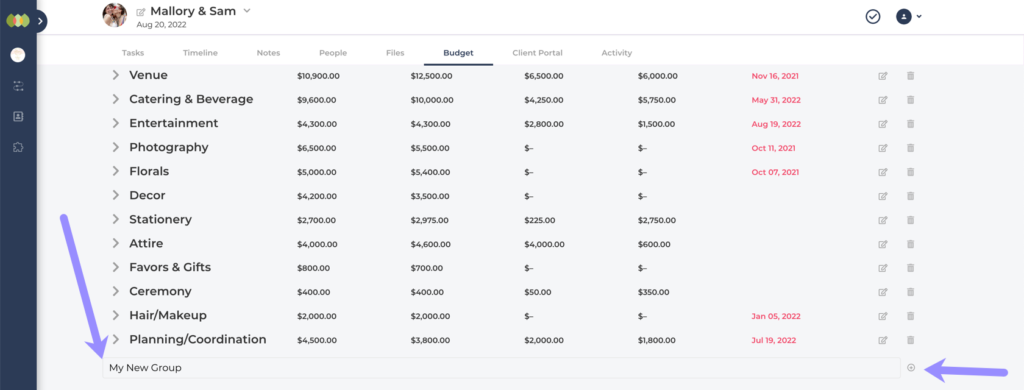
Every expense in a budget belongs to a group. Look for the Add Group input near the bottom of the page. To add a new group, just type in the group name and hit the return button on your keyboard or the + button on the far right of the row.
Adding Expenses
Now we’re getting to the most important part of an event budget tracker. Adding the expenses. Enter an expense name in the group’s expense input. You can also add an estimated cost and actual cost of the expense. Like this:
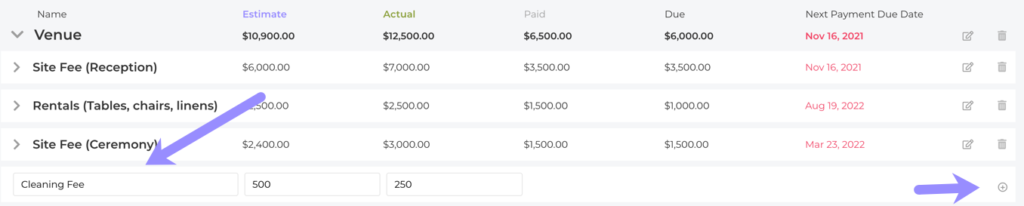
Just like when you add a group, you can hit return on your keyboard or click the + icon to save the expense.
Now you’ve added an expense, you add begin to track payments.
Managing Payments
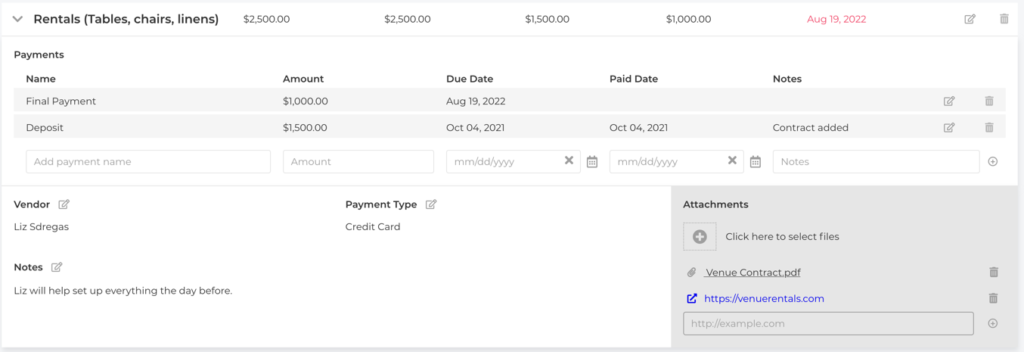
You can add payments to each expense, as many as needed. A payment includes the payment’s name, an amount, a due date and a paid date. Each field is optional, so if you don’t have the info yet, don’t worry.
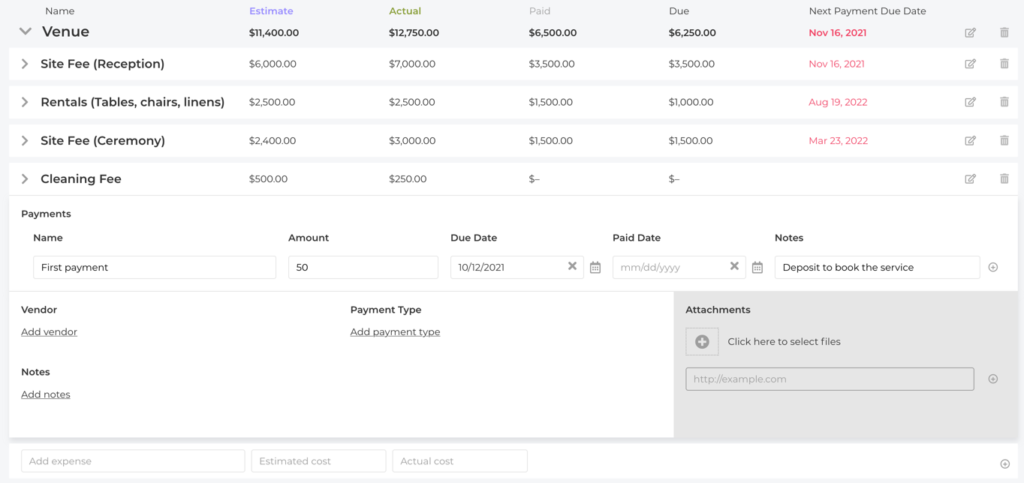
Each time to add a paid date, ThymeBase adds that payment to the Paid column and shows you when your next payment is due in that group and how much is left too. You can also see your upcoming payments at the top of the budget tracker.
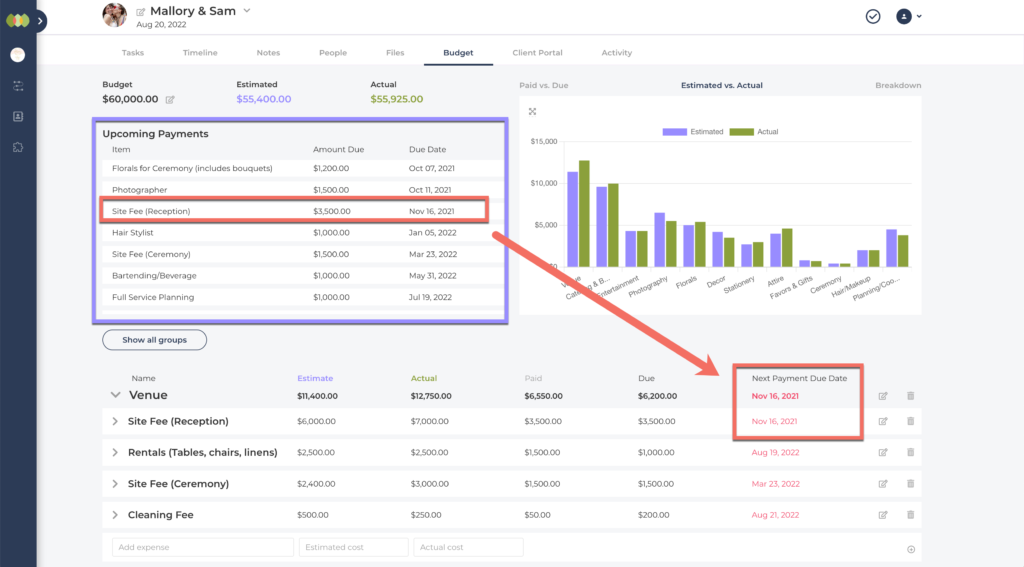
In the above example, we can see our next payment is Florals (due Oct 7th), but the next payment for the Venue group is the Site Fee on Nov 16th. When you add payments, you’ve got great visibility into the payment schedule for all vendors.
Adding More Detail To Expenses
You can add more detail to each expense including vendor details, long-form notes as well as payment type. And you can also include file attachments like invoices and receipts. This is perfect for keeping all the financial paperwork in one place.
Pro Tips To Get The Most From The Event Budget Tracker
- Use the graphs at the top of the event budget tracker to get a birds eye view of your event.
- The Estimated Vs Actual graph visualizes exactly where you overspent on your budget or which groups might have “surplus” budget.
- The breakdown graph visualizes the relative costs of everything so you can see where your biggest costs are.
- Be diligent about attaching receipts, invoices and contracts to the expenses. It’s a fantastic way to quickly find the documentation when you need it.
- Because the event budget tracker is mobile-friendly, you can work on the budget while you’re away from your laptop. That way, you don’t need to add expenses later and risk missing something.
Coming Soon
The budget tool is a work in progress. If you have any questions, thoughts or feedback, please get in touch. Coming soon we’ll be adding:
- Share and download
- Notifications
- Reminders
- Client collaboration via the client portal
Lastly, if you’d like a Google Sheet version budget tracker, well, we’ve got you covered.